
How to Install Drupal CMS
Drupal is a completely free, robust content management system written in PHP language. It is used as the main CMS for many educational, governmental and commercial websites. It has the potential to be customized for any kind of websites.
There are many content management systems available out there but there are so many advantages that make Drupal one of the best choices to install on websites. The main advantages of Drupal CMS are as below:
- Completely open-sourced and free-to-use
- Full control over visitors, members , authors and being able to define multiple user-roles
- Full WYSIWYG editing tool for writing articles
- One of the most secure CMS available as of today
- An active community with thousands of tutorials for every little detail of managing the CMS
- Scalable by installing thousands of modules available for free
- Highly flexible and configurable for any kind of website
If you are already convinced to install Drupal CMS (which is a very wise decision) maybe you need some help and tutorials to do it as good as possible. Here we are going to teach you all steps and requirements for installing Drupal CMS.
Requirements for Installing Drupal CMS
If you need to install Drupal CMS for your website, you would need to have a web hosting at first which is the obvious basic requirement for launching any website. You can install Drupal CMS on both Linux based servers as well as Windows servers.
Almost any webhosting is capable of installing Drupal. The basic requirements you would need to install Drupal CMS are:
- Apache (or another web server)
- MySQL (or another database server)
- PHP
After making sure about your hosting, you would need to download Drupal source code. However, the recommended way of installing Drupal by Drupal’s community is through Composer – a PHP dependency manager.
Composer is a tool for dependency management in PHP. It allows you to declare the libraries your project depends on and it will manage (install/update) them for you.
Steps to Follow to Install Drupal CMS
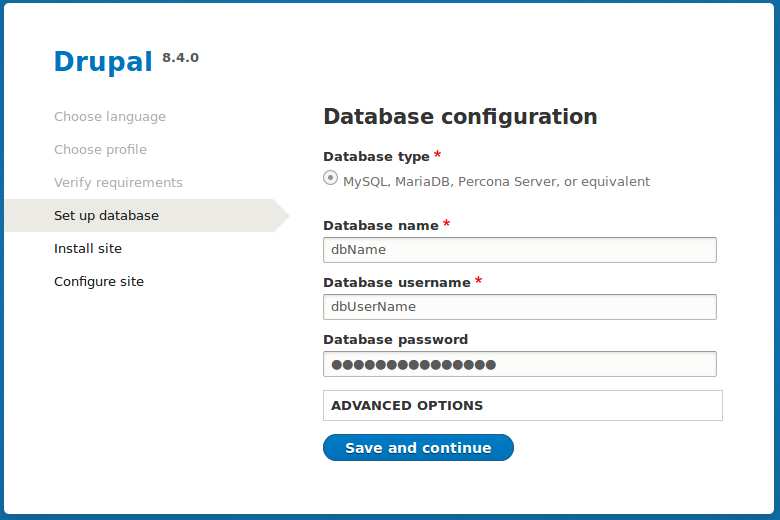
After you download the Drupal code, you need to create a database for your Drupal site. There are many ways to create databases. If you run cPanel or any other control panel, it would be easier; otherwise, you can use phpMyAdmin.
Create Database Using Control Panels
To create a database in most control panels, you will need to click on Database Wizard and then choose a database name, database username and database password and then check all privileges and that’s it. You successfully have made a database.
But you would need to keep a record of database name, username and password because you will need them during the installation process.
Create Database Using phpMyAdmin
To create a database using phpMyAdmin, you need to follow these steps. Go to the admin panel of phpMyAdmin and login by entering your username and password. Then from the main menu items, click on the Database.
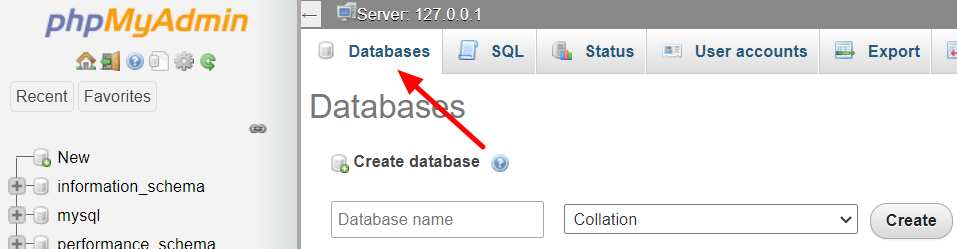
Now you need to choose a database name. Type your desired name in the text field. Make sure to select one of the utf8mb4_unicode_ci or utf8mb4_general_ci for Collation.
Now go back to the main panel of phpMyAdmin and then click on User accounts.

Now you should click on Add User Account.
Now you have to fill the required fields to make your database. Type User Name, Host Name and Password.
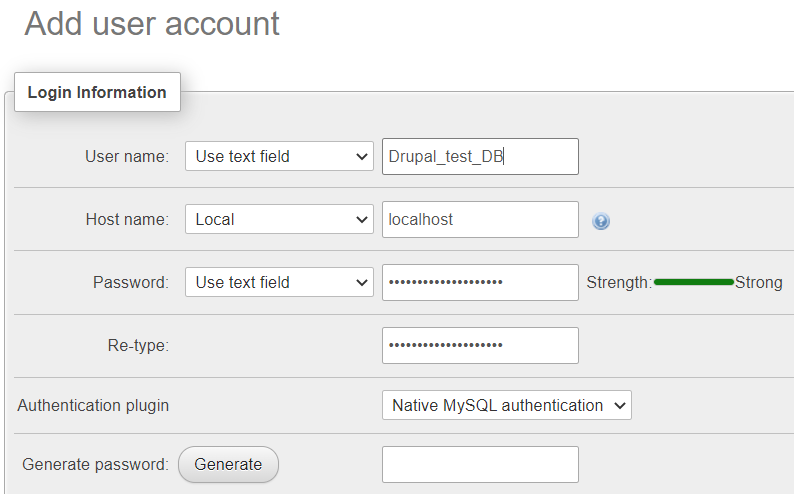
Now you should select the permissions for your database. You can select all the fields or choose them according to your needs.
Running the Interactive Installer
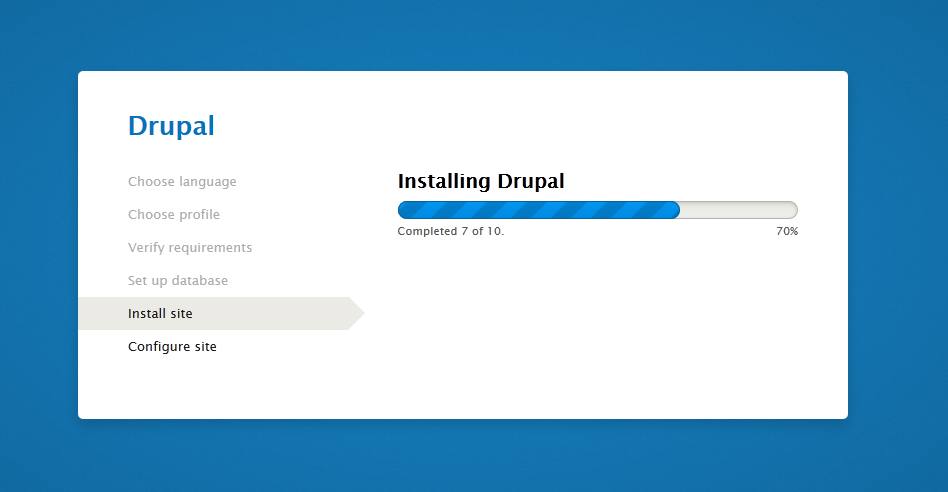
After creating the database, you need to run the installer. At first go to www.yourdomain.com/install.php ( You can install Drupal on the main folder of your domain or choose a subfolder if you have uploaded Drupal on a subfolder)
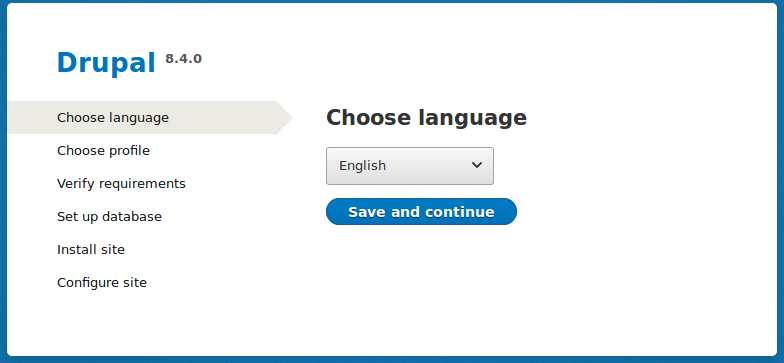
At first you would need to choose the language.
Then select either standard or minimal installation method. Standard installation includes the core software, contributed modules, themes, and pre-defined configuration and is recommended for most users, especially new Drupal users.
Now you would need to enter that database information we mentioned in the previous section to start the installation process.
After successful installation you can configure some of the basic settings of your new Drupal website like: Site name, site email address, admin username and password, time zone and finally you can set updates and notifications settings.
Now you have successfully installed Drupal CMS on your website and you can customize it using thousands of modules and themes according to your requirements :)