

How to Change the Screen Off Time in Windows 10 and 11?
If you have a computer with Windows 10 or 11 and you want to change the screen lock time, then this article will be useful for you.
Leaving your computer screen on for a long time will waste electricity, and on laptops it will drain the battery sooner. That’s why Windows 10 and 11, like most operating systems today, automatically turn off your screen if you’re not using the device.
This work, which is done to save electricity consumption and not waste energy, is naturally not very intelligent and sometimes annoys users. But luckily, you can easily change the screen lock time in Windows 10 and 11.
In the latest version of Microsoft’s operating system, i.e., in Windows 10 or 11, you can set how long your screen should turn off when plugged in and also when using battery power. Of course, if you’re using a desktop computer, you won’t see the battery power option.
Change the Screen Off Time in Windows 10 and 11
In the following, we will look at the method of changing the automatic closing time of the screen in Windows 10 and 11. The working process in both windows is almost the same, but they differ only in details.
Follow these steps in Windows 10:
- First, you need to click on the start menu and then select the gear icon to open the settings menu. You can also enter settings by pressing the Windows + I keys.
- Next, you must select the System option in the settings window.
- Then you need to select Power & Sleep in the sidebar.
- If you’re using a desktop computer, you’ll only see the “When Plugged In” drop-down menu under the Display and Sleep section. If you’re using a laptop or tablet, you can also see the “On Battery” drop-down menu.
- To change the screen off time, select the drop-down menu under the Display section.
- Now you need to select one of the options to determine how long the screen will be on (minute means “minute”, hour means “hour” and never means “never”).
- If you have two sections “On battery” and “When plugged in”, you will need to repeat the process above for both. That’s all you need to do in this area.
In Windows 11, to change the screen shutdown time, follow the steps below:
- Right click on the start icon and select Settings. You can also enter settings by pressing the Windows + I keys.
- Then go to the Power section of the settings menu.
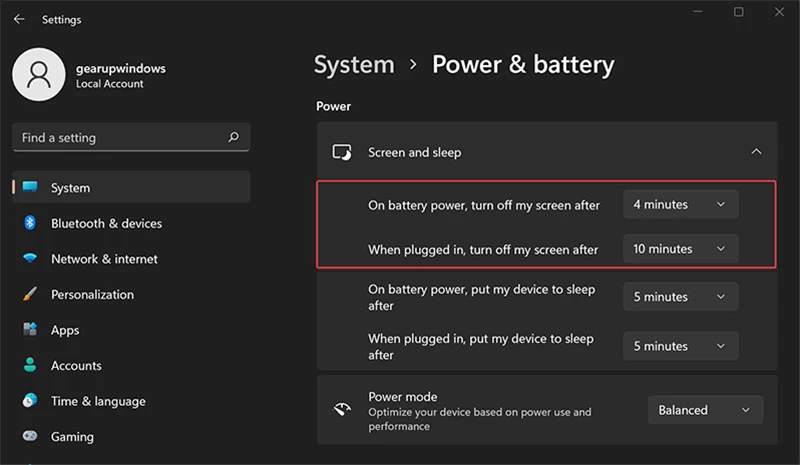
- Now open the Display and Sleep menu.
- From this step, proceed as step 4 above (Windows 10).
- The “turn off my screen after” option specifies the time for the automatic shutdown of your computer or laptop screen.
- The “put my device to sleep” option also determines whether your system will enter sleep mode after a few minutes or a few hours.
Another way to change the screen off time in Windows 10 and 11
Another very simple method you can use is to skip the first steps of the previous method. Instead of going to settings, simply search for “power plan” in your Windows search box. Now if you open the first result (Change Power Plan), you will be faced with a page just like Step 4 onwards of the previous method.
- “Turn off the display” option specifies the time to automatically turn off the screen of your computer or laptop.
- The “Put the computer to sleep” option also determines that your system will enter Sleep mode after a few minutes or a few hours.
In this article, we tried to teach you how to change the screen lock time on computers with Windows 10 and 11. Remember that the screen off is not the same as sleep mode. So your computer will stay on even if the screen is off. For this reason, it is best to check your computer’s sleep settings.