
How to Format USB Flash Memory in Windows and Mac
Formatting a USB flash drive is a requirement of most computer system users. In this article, we will teach you how to format USB flash drive in Windows and explain its different formats.
In the past, it was always recommended that if you just bought a flash or hard drive, format it after unpacking. But as time went by, less attention was paid to this issue and gradually everyone realized that there is no need for this work. The types of memory you just buy are pre-formatted, there is no need to format them before first use.
On the other hand, there are times when you bought a used USB flash drive or you want to use someone else’s external memory, and you may need to format the flash drive to remove viruses or delete undeletable files. Sometimes, when your flash memory is not working, formatting it can fix the problem.
Formatting is actually the process of preparing external memory, such as a USB flash drive or hard drive, to store information; But for this all material on it will be destroyed. First, it is better to familiarize yourself with various formatting methods and formats; Because it is necessary to know them in order to choose the best option for your work when formatting flash memory.
All kinds of ways to format USB or any flash
In general, there are two formats for USB flash drives that we will look at.
Quick Format: The “Quick Format” option is a lifesaver for users who want to quickly format their flash drive and is considered the most common way to format a flash drive. This option quickly deletes all files and folders inside the flash drive; But it is not the safest way to format the flash and the files deleted by this method may be recoverable in the future with recovery tools.
Full format: A safer but longer way to format a USB stick is to use “Full format”. This option will scan all lockable parts of the flash drive and completely and permanently delete all files and folders from your USB flash drive. The entire format may take a long time, depending on the capacity of the external memory.
Various options in the file system section
When you want to format your flash drive, you will be faced with various options to format it. One of the most important of these options is the file system section, which is better to know the use of each one; Because sometimes choosing the wrong option can disrupt your work. Below we explain the most common file systems in flash memory:
- FAT32: may have heard the name of this option a lot; One of the most common flash drive formatting options that works well on both Windows and Mac. The problem with this method is the lack of security and limits your files to 4 GB. That is, if you want to transfer files larger than 4 GB (the size of a single file, not the sum of several files or folders) with your USB drive, you should not format it with this option.
- exFAT: the ideal file system for formatting flash drives that is fully compatible with both Windows and Mac. exFAT does not have a 4 GB limit and is suitable for users who deal with heavy files.
- NTFS: NTFS format is used to convert a USB drive into secondary device storage; Because it compresses files and increases file transfer speed. NTFS on Mac is read-only unless you use a third-party application to write and modify data on it.
For Mac users, instead of this option, we recommend the “Mac OS Extended” option, which can only be recognized on Mac.
How to format a flash drive in Windows
Now that you are familiar with various formats and options, let’s go to the tutorial on how to format a USB flash drive in Windows. To do this, follow the steps below:
- Insert the flash drive into the USB port.
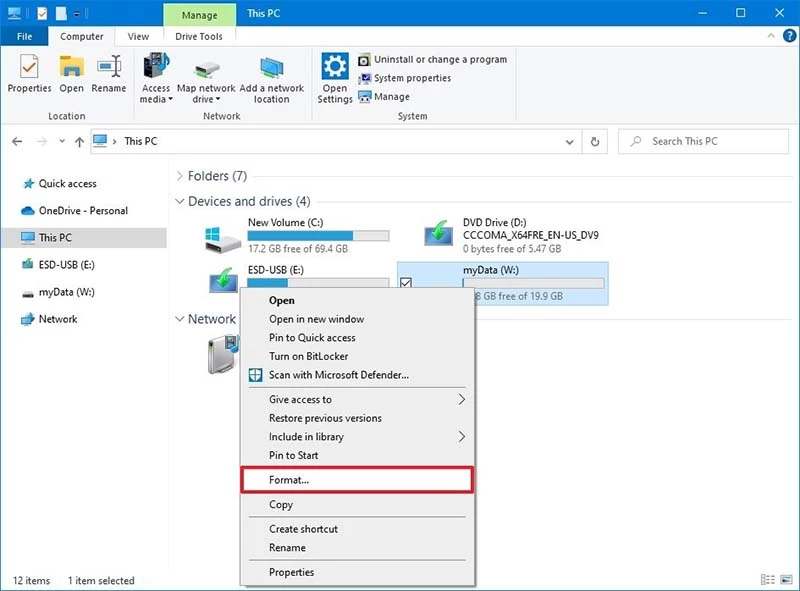
- Open your files and find your flash drive in the section that says flash drive or other external storage.
- Right click on the icon and then select “Format”.
- In the “File System” section, you can select any of the items we explained in the section above.
- In the “Volume label” field, you can enter the name you want to choose for your USB drive. This name will appear in the File and Folder Manager.
- Under the “Format Options” section, you can check the “Quick Format” option if you want. From the first part of the article, read the difference between full and regular format.
- Then “Start” and after that, press “Yes” option.
- Wait until the process of formatting the USB drive is complete. After that your flash is formatted and ready.
How to format flash memory on Mac
Formatting a USB flash drive, like all other tasks, is a little different on Mac than on Windows. Next, we will check how to format flash memory in Mac OS:
- First, insert the flash drive through the USB port.
- From the Programs and Applications section, run the “Disk Utility” program.
- From the list that opens to you on the left, select the USB drive you want.
- Tap on the “Delete” option at the top of the screen.
- In the “Name” section, you can give your flash a name so that it appears in file management programs.
- Now, in the “Format” section, select the format (the file systems we talked about) that you want.
- Click “Erase” to start the formatting process on Mac.
- After completing the process, finally click on “Done”. Now the USB drive is formatted and ready to use and store your files.