
How to Have a Better Battery Life on Windows 11
All users on any operating system would like to achieve better battery life on that OS. Before talking about the methods to get better battery life on Windows 11, let’s talk a little bit about Windows 11.
Windows 11 has benefits and some great-looking new features, but it might also have some drawbacks that can be frustrating for users.
For instance, while you are working with Windows 11, a lot of apps are running in the background and you don’t have control over them. Although you can use some best tools to terminate running apps on Windows 11, if you don’t like to use those programs for any reason, they can slow down the Windows 11 speed, and in addition to that, they use more power from your laptop and drain your battery faster.
Maybe you update your Windows 11 to the latest version whenever a new update is available for that, or maybe you want to disable the automatic updates in Windows 11, but in both cases, you still see that power consumption is not that great in Windows 11 and you need to recharge your laptop’s battery every now and then.
Sometimes some updates have issues, and they can lead to more power consumption. Fortunately, there are some methods that you can use to improve the battery life of your laptop and increase its uptime, even for a few minutes.
List of the Best Methods to Improve Windows 11 Battery Life
1. Put Your Laptop on Battery Saver Mode
Battery saver mode is an option available in Windows 10 and Windows 11 that allows you to set a predefined set of configurations for your windows, including dimming the screen, lowering the CPU frequency, etc., and all these actions can save your battery life.
Although using battery saver mode can reduce the performance of your laptop, it’s still beneficial for the times you don’t need to run your laptop at full speed and you need to have more battery life rather than speed.
To put your laptop in battery saver mode, follow the steps below:
- Go to the Settings of your Windows 11 operating system by pressing Win + I keys and click on System->Power & Battery.
- Toggle that button under the Battery Saver option.
You can also set your laptop on battery saver mode automatically. To do so in this window, you need to set a percentage, and it tells your operating system to put your laptop in battery saver mode whenever the remaining battery level reaches that percentage.
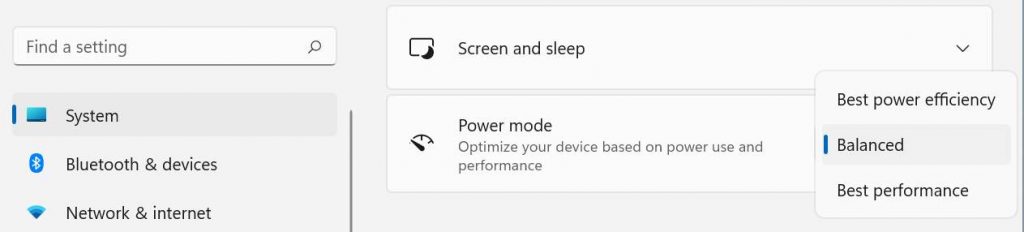
2. Use the Predefined Power Plans
Windows 11 has three different preset settings for your power usage. You can easily switch between them to save more battery life. These power plans are as: best performance, energy efficiency, and balanced.
Usually, for most users, when they are doing the daily tasks on a computer, the balanced may be the best option because it really has a balance between the power consumption and the speed of your computer, but if you are doing something that doesn’t need that much hardware resources and the tasks can be easily done without using too much CPU and other hardware resources, you can switch to the best power efficiency.
And finally, if you really need to run your laptop at full speed and you are running hardware-demanding tasks, you need to choose the Best Performance option that uses the most power from your laptop and also runs at its best possible performance.
If you have decided to put your laptop in the best “power efficiency mode,” which may or may not be available on all brands of laptops, you need to do as follows:
1. Press Win + I to access your computer’s settings.
2. Navigate to System->Power & Battery.
3. Choose the best power efficiency mode to get the most life from your computer’s battery life without needing to recharge it frequently.
3. Dimmer Laptop’s Display Screen
One of the things that uses power in most electronic devices is the display screen. Lowering the power consumption of display screens can significantly improve the battery life.
Although it’s not always recommended to lower the screen brightness, depending on the environment you are in, you may need a brighter screen or a dimmer one. And you should evaluate the situation in the environment and make a decision based on that.
Because if you lower the brightness of your display screen a lot, it can put pressure on your eyes. You should use the appropriate amount of brightness for your display screen to reduce eye strain while you are working on the computer.
If you are sure that you don’t need that level of brightness while you are working with your laptop and you want to make your display screen dimmer, follow the below steps:
- Press Win+I to go to the settings of your window.
- Click on System and then click on Display.
- On your display screen, you will see a slider that helps you decrease or increase the brightness of your display. Use that and set the appropriate amount of brightness for your screen.
4. Prevent Unwanted Apps from Running in the Background
By default, there are so many applications that are running in the background, and they all use CPU and other hardware resources, which may lead to having less battery life on your laptop, but fortunately you can disable all or some of them according to your requirements.
To prevent some applications from running in the background of your computer, do as below:
- Go to the settings of your computer by pressing Win + I.
- Click on the System -> Power & Battery
- You can see all the running applications. To prevent them from running in the background, on the app setting page, change the Let this app run in the
5. Change the Sleeping Properties of your Laptop
Another excellent approach to extending the life of your device’s battery is to make your computer turn off when it’s not being used to have a better battery life.
The easiest method to achieve this is to reduce the amount of time your laptop has to wait before going into sleep mode.
You can set any amount of time in minutes for your laptop to go into sleep mode while it’s not being used. Here’s how you can do it:
- Go to the settings of your computer by pressing Win + I.
- Click on System -> Power & Battery.
- Under the Screen and Sleep section, set the amount of time to put your laptop to sleep.
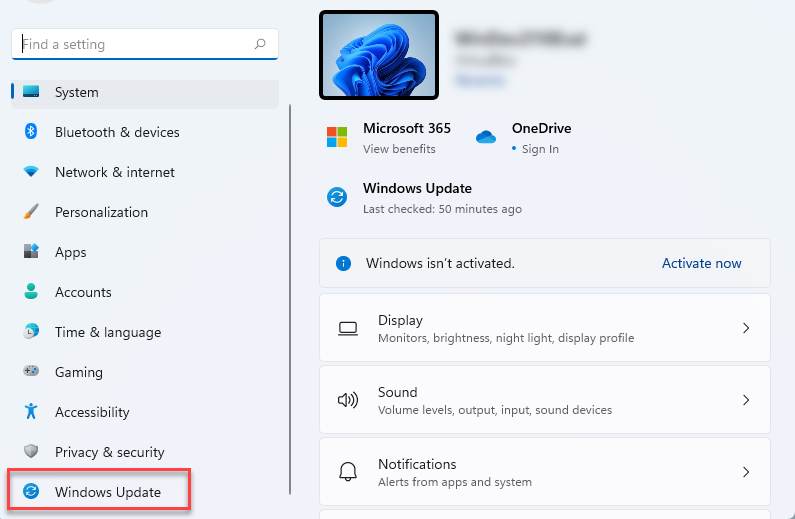
6. Keep your Windows 11 Updated
Maybe it’s not the best option because you may see this option for any problem your computer may have faced. For example, if your computer faced BSOD, the first recommendation to fix blue screen of death would be updating your Windows to the most recent version by receiving the most frequent patches for it.
You will get this recommendation as the first option for most of the problems within your Windows OS. For example, some say that the best way to repair the blue screen of death is by updating Windows.
It is a general recommendation that is useful in some cases, and it may not help you at all in many other cases, but as normal, we say it as an option for helping you to have a better battery life on your laptop.
When you update Windows 11, you should expect better performance and more optimization. With every Windows 11 update, you receive patches for the security issues and probably performance and other issues that the previous version of Windows had.
It is very easy and straightforward to update Windows 11 to the latest version, and to update your Windows 11, do as below:
- Open the Settings on your computer. You can do that by pressing these keys at the same time: Win + I
- There are many options on the left side of the opened window, and the last option you should choose is Windows Update. Click on that.
- Now you just need to click on Check for Updates and it automatically checks for the latest version of Windows and if there are available updates for your operating system, it downloads and installs them automatically.